Creating an Invoice Batch
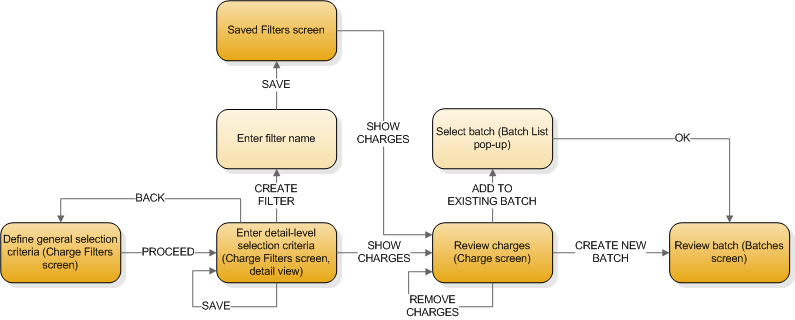
When you are ready to generate invoices, you’ll first need to create an invoice batch. This involves selecting the charges to include in the batch (either by creating a new charge filter or running a saved filter), reviewing the selected charges and making any necessary changes, and finally generating the batch.
Specify Selection Criteria
Create a new filter
Use a saved filter
As discussed in step 6 above, you can save filters for re-use. Rather than re-entering filter information each time you want to create an invoice batch, you can select a saved filter to run.
Review Selected Charges
After you select charges (through a new filter or by using a Saved filter), the system displays a list of all selected charges. You can review these charges prior to creating the batch.
Editing a Charge
- Display the details of the charge you want to edit.
- Make the necessary changes to the charge record.
- Click .
- Click to return to the list of charges.
Remove Charges from the Batch
Generate the Batch
After you have reviewed all the charges and are ready to continue, you can generate the Invoice Batch. You can either create a new batch for the charges, or you can add the charges to an existing invoice batch.
Creating a new Batch
On the Charges List view, click . The system creates a new batch in Open status, and displays the new batch on the Batch list view of the Batches screen.